Thursday, December 20, 2012

DIY Reverse Applique Stockings

 Ever since scoring this bad boy on Black Friday, I've been flexing my sewing muscles every chance I get.  I made Madison's skirt, a couple more similar skirts for nieces as Christmas gifts(shh, don't tell), and now stockings.
 For the stockings, I wanted to stick with the same color scheme I used for our toddler-proof Chrismas tree.  I also wanted to make them fully personalized.  Until this year, personalized stockings equaled puffy paint applied with terrible handwriting to the cheapest stockings Walmart had to offer, so there was definitely room for improvement.

I started where any originality/creativity challenged DIYer would: Pinterest!  I didn't really find much that struck my fancy until this happened:


It inspired me not just with the color (grey would/did look great combined with the ultra-bright colors of our tree), but also with the bold style.  Until I came across this pin, I never really considered putting the names on the stockings instead of the cuffs.  I had also never heard of reverse applique.

I decided to go for it, but failed to take many pictures of the during.  If you're looking for a tutorial, Jackie did a great job with hers (just click her picture above).

For font, I loved the way Helvetica looked for Jackie's stockings, but I wanted to use a font that I either already had or could get for free.  I found Lowvetica Extra Bold (sorry, don't remember the font website I used, just whatever came up first on Google) and decided it could work.

I used our old stockings to make a cardboard template, then used the template to trace and cut out six pieces (for three stockings.  Sorry Bella).  Then I traced each of our names(backwards) onto the paper backs of three rectangles of fabric interfacing and ironed them to the wrong sides of our stockings.  I carefully cut the letters out (using my fabric scissors on the paper with gritted teeth), then peeled off the paper backing and ironed colored fleece rectangles over the interfacing. 
I sewed fabric faux cuffs to the fronts of each stocking (pink houndstooth for us girls and green with blue poppies for Pat), then put the right sides of the stocking pieces together and sewed them all the way around.  I added tabs made of the opposite fabric (ie I used the pink for Pat's and the green/blue for ours) and matching fleece on the back. 

Then they sat on our kitchen table until last night when I begged Pat to build just one of the three shelves I want in the kitchen.  And here they are!
The shelf still needs to be painted (it came already primed), and we're going to add two more below it where the tape is.  Well, not exactly where the tape is, they'll all be the same width. 

Anyway, I used books and yarn to hang them.  I just strung one long piece of yarn through the books and the stockings.  Then I added the "NOEL" letters, made of cardboard wrapped with more...yarn.  Yeah, it's a very yarny Christmas for us.  That's also our "ribbon" for presents this year!
Oh, and if you look closely you'll see that the middle part of Madison's "a" is missing.  It fell off, but I've got big plans for getting it stuck for the long haul.

Merry Almost Christmas!
-Kelli

Thursday, December 13, 2012

Another Madi Update

WARNING: If you have no interest in the bodily functions of our toddler, you can safely skip this post.  See ya next time!

Madison is seventeen months old (eighteen on the 22nd), and seems determined to grow up.  The last couple of weeks have brought so many changes in her that my head is spinning! 

For starters, she woke up yesterday with wavy (not curly) hair.  When it's wet, her hair reaches to her shoulder blades, but it always curls back up to her head about two minutes after she gets out of the tub.  Well yesterday morning (12 hours after bath time), it brushed her shoulders.  Craziness.

As if that's not bad enough (for a mom who still kind of wants her baby to be a baby forever), she has decided it's time to potty train.  We have been talking with her about it for a while now, but didn't plan to start this early.  Every time we change a diaper, we tell her that one day she'll be a big girl and go pee-pee or poo-poo in the potty like Mommy and Daddy.  On Tuesday (Dec 11th), she told Patrick, "poopoo".  He asked if she needed to go, and she said yes.  On a whim, he asked if she wanted to go in the potty, and she ran to the bathroom!  She didn't finish the job, but did sit and strain for a while before signing "all done". 

Yesterday (the same day her hair uncurled), she told me she needed to go poo-poo.  I took off her clean and dry diaper and set her on the potty.  In the space of about a minute, she managed to go #1 and #2!  Then she signed "all done".  After taking care of all the sanitary business of wiping, diapering, flushing, and washing hands, we spent about five minutes clapping for Madi.  Every time I stopped clapping, she would start again.  I was so surprised that she got it all out...her diaper stayed clean and dry for almost two hours! 

I think at this point we're just going to let her keep the lead, going to the potty only when she asks.  I've never done this whole potty training before, so I'm a bit intimidated by the big girl panties and the accidents that seem to come along with them.

I'd sure love any potty training tips or tricks you have to offer!

Happy Thursday!
-Kelli

Tuesday, December 4, 2012

Uh Oh, Christmas Tree


This year our Christmas tree is a few things:  Unique.  Creative.  Weird.  Cool?  DIY.  Pretty.  Cheap!  Easy.

With a few reservations, I do like it.  We originally planned to do the traditional (for us, anyway) real seven foot tree.  I figured we could teach Madison not to touch it, just like we have with the chemicals under the sink, the glass in our buffet, the trash can, the (covered) electrical socket, etc.  But then, when she saw her first Christmas tree of the year (for our Santa pictures at my aunt's house), something awful and kind of cute happened:  she pointed to an ornament on the tree and said, "Bawl."  Madison is pretty good at minding simple rules, but when there's a "bawl" on the line, all the rules go out the door.  She LOVES to touch, "catch", throw, and kick balls.  She loves to put them on her head, in her shirt, in a bag, under the couch, or in her crib.  Other than me, they're pretty much her favorite thing (sorry, Patrick).

So I knew that having any "bawls" in her reach was going to be a nightmare.  I started brainstorming:  what if we put the tree behind the couch with a baby gate?  (Answer:  she'd climb over the couch or over the baby gate.)  What if we just had a tabletop tree this year?  (I would never get into the Christmas spirit.)  What if we didn't use any ball ornaments?  (We would have about three ornaments on the tree.)  What if I just did the regular tree after all?  (Terrible twos would come early.)

Then, feeling defeated, I took Madison to Walmart just to look at the options, hoping for inspiration.  That's when I saw it:  5-6 ft real trees for just $19.  At this point, I wasn't thinking about the Madi problem; I was just seeing dollar signs.  I could make this work!  My first thought (which lasted for about fifteen seconds) was to have a HUGE tree topper.  Then I saw it in my head and realized how silly that would look.  Then I thought, "What if we elevated it from the bottom?  Ooh, if we raised it high enough, Madison couldn't touch it!  AND it would be cheap!!!"  At this point, it was a done deal.  All I had to do was convince Patrick to build me a riser, and I've convinced him in the past to do much worse things with his Saturdays.

The end result:


Here's how we (he) did it:
  • He built a box from scrap 2x4's and plywood.  It was going to be wrapped like a present, so we didn't need anything fancy.
  •  He screwed our existing tree stand to the top.
  •  He put 50 lbs in the box so it wouldn't be top heavy with the tree.  That's why he put plywood on the bottom, too.
  •  He cut the bottom off the tree so it could absorb water better?  (I've never understood this part...isn't it already cut?)
  • He manhandled it into the tree stand by himself so I could take pictures for posterity.
  •  He stood back and pondered how crazy the woman he married is.
  •  He realized that the trunk was way thinner than our tree stand was made for.  This threw about an hour's worth of head scratching, sawing, and bolt tightening/loosening into the mix.
  •  This is where I took over.  I reworked the box from our tv into a "gift box" to go around the base and stand. 
  • I stapled (with our staple gun) the box to the wooden riser.  I left the existing folds at the top of the box to help complete the look, hoping that once the branches fanned out it would look good.
  •  I wrapped the whole thing in our wrapping paper for this year...brown craft paper!  The beauty of using it here was that it almost perfectly matched the color of the cardboard underneath, so my less than perfect wrapping job is pretty well disguised.
We did all of this over dinner and an episode of Dora, but at this point it was Madison's bedtime.  So we put her down and (I) got to decorating!

I burned out on the pompom garland making about an hour after Madi went down, so this is what we had the next morning:
And here's the end result!  At least it's the end unless/until I figure out what I want to put on top of the tree.  I also want to make a giant tag or something for the "present", but I want it to match our real presents, so that'll have to wait until I decide which way we're going for labels.
 
I'm SO glad to be "done" with it.  I'm sure I'll be making small changes right up until Christmas, but the work is over!

Oh, and it passes the Madi uh-oh test (meaning I haven't had to say "uh-oh" yet).  She can touch a few of the bottom ornaments with one finger if she stretches up on her tippy-toes, but I don't see her getting a hold of any of them this year (knock on wood).

Have you put your tree up yet?  Have you ever had to do an edited Christmas tree for a toddler?  What was your edit?  Most importantly, how are you labeling your gifts this Christmas?

Merry Tuesday!
-Kelli

 PS:  I linked up over here!

Monday, December 3, 2012

What Our Office Really Looks Like

So I've left out a little tidbit on here for a while now.  The last time I showed you our office, it looked like this:
That picture of Madison is still our wallpaper..it's been Christmas all year!


 Sorry for the even worse than usual picture quality...I guess I had my camera set to low quality, probably so I could Craigslist something.

I hated almost everything about this room.  The bed jutting out and being the first thing you saw from the door made the room look smaller than it is-it's actually the largest bedroom in our house.  The bookshelf was not great quality (laminate), not safe (it leaned against the wall...we could have bolted it down if we liked it, but not-so-much).  The desk being stuffed in a corner made being on the computer not fun at all.  The desk itself, even though it was a very nice piece of furniture, was super dark and heavy-feeling.  It was also literally heavy.  Just ask Pat and the two guys that came to buy it.  (With Patrick lifting one side and two men lifting the other, his back hurt the next day!)

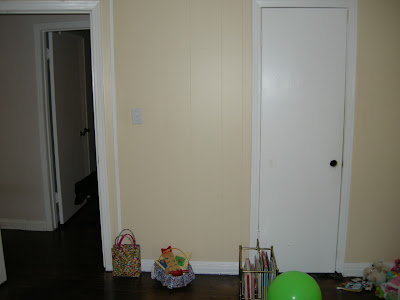
Obviously we sold the desk.  We also sold the bookshelves and bed, leaving the room empty except for Madi's toys and our computer on the ground.  So here's the (not at all finished) reveal:

Here's what we've done so far:
  • Sold everything (clearing out the room)
  • Bought a futon ("Emily" from Walmart...love it)
  • Built a desk (and painted it blue BECAUSE WE CAN)
  • Moved Madison's nursery rug into the office (because it's so nice and plush, but we never play in her room)
And here's what's yet to be done:
  • Paint the walls (probably a soft grey so I can call myself a real blogger, haha)
  • Replace the light fixture
  • Address window treatments
  • Build a console for under the desk (to hold/hide the PC, file box, and other ugly but necessary desk things)
  • Finish refinishing the two desk chairs we already have (which you've never really seen)
  • Untangle and hide all the cords
  • Convince Patrick we don't need a printer
  • Sew Madison a poof cover to contain all her stuffed animals (the huge pile in the corner by the futon)
  • Hang real art (what's on the walls is literally only there because I didn't want to find space in a closet and the nails were already there)
  • Replace the missing closet door knob
  • Find a thrifted or free tv table (but not for a tv) for the wall across from the futon (the one on your right when you come in the door) for additional toy/office storage and a place for Madison to draw/color
  • Cover the fronts of Madison's diaper toy boxes (under the futon) with fabric
Phew!  Between this room, Christmas gifts, and DIY Christmas decor, I am SOOOOOOO overwhelmed with projects right now.  But I'm also really excited for what I hope will be a great result. 

Are you overloading your (metaphorical) plate right now?  (Do you spend more time talking parenthetically than not?)  Do you have any soft grey (gray?) walls in your home?  Does all this talk about grey make you curious about the next episode of Grey's?

Happy Monday!
-Kelli